If you started your tour of the DFINITY Canister Software Development Kit (SDK) with the Quick start, you have already seen the basic work flow for creating applications that run on the Internet Computer. Now, let's take a closer look at that work flow by exploring the default files and folders that are added to your workspace when you create a new project.
As a preview, the following diagram illustrates the development work flow when running the Internet Computer locally on you computer. 
Before you start this tutorial, verify the following:
- You have an internet connection and access to a shell terminal on your local macOS or Linux computer.
- You have node.js installed if you want to include the default template files for front-end development in your project.
- You have downloaded and installed the DFINITY Canister SDK package as described in Download and install.
- You have installed the Visual Studio Code plugin for Motoko as described in Install the language editor plug-in if you are using Visual Studio Code as your IDE.
- You have stopped any Internet Computer network processes running on the local computer.
As discussed in the Quick start, applications for the Internet Computer start as projects that you create. You can create projects using the dfx executable command-line interface (CLI).
To take a closer look at the files and folders that are included in a project by default, let's create a new project to work with.
To create a new project:
- Open a terminal shell on your local computer, if you don't already have one open.
- Navigate to the folder you are using for your Internet Computer projects, if you are using a separate working folder.
- Create a new project by running the following command:
Thedfx new explore_hellodfx new explore_hellocommand creates a newexplore_helloproject, including a default project directory structure under the new project name and a new Git repository for your project. If you havenode.jsinstalled locally, creating a new project also adds some template front-end code and dependencies.
To ensure that project names are valid when used in JavaScript, Motoko, and other contexts, you should only use alphanumeric characters and underscores. You cannot include dashes or any special characters. - View the default directory structure by running the following command:
By default, the project directory structure includes at least one source subdirectory, a template README.md file, and a default dfx.json configuration file. Depending on whether you have node.js installed, your project directory might include some or all of the following files:ls -l explore_hello
At a minimum, the default project directory includes the following folders and files:explore_hello/ |-- README.md # default project documentation |-- dfx.json # project configuration file |-- node_modules # libraries for front-end development |-- package-lock.json |-- package.json |-- src # source files directory | |-- explore_hello | | |-- main.mo | |-- explore_hello_assets | |-- assets | | |-- logo.png | | |-- main.css | | |-- sample-asset.txt | |-- src | |-- index.html | |-- index.js |-- webpack.config.js- A default
READMEfile for documenting your project in the repository. - A default
dfx.jsonconfiguration file to set configurable options for your project. - A default
srcdirectory for all of the source files required by your application.
srcdirectory includes a templatemain.mofile that you can modify or replace to include your core programming logic. Because this tutorial focuses on the basics of getting started, you are only going to use the main.mo file. If you havenode.jsinstalled, your project directory includes additional files and directories that you can use to define the front-end interface for your application. Front-end development and the template files in theassetsfolder are discussed a little later. - A default
By default, creating a new project adds some template files to your project directory. You can edit these template files to customize the configuration settings for your project and to include your own code to speed up the development cycle.
To review the default configuration file for your project:
- Open a terminal shell on your local computer, if you don't already have one open.
- Change to your project directory by running the following command:
cd explore_hello - Open the
dfx.jsonconfiguration file in a text editor to review the default settings.
For example:
Let's take a look at a few of the default settings.{ "canisters": { "explore_hello": { "main": "src/explore_hello/main.mo", "type": "motoko" }, "explore_hello_assets": { "dependencies": [ "explore_hello" ], "frontend": { "entrypoint": "src/explore_hello_assets/src/index.js" }, "source": [ "src/explore_hello_assets/assets", "dist/explore_hello_assets/" ], "type": "assets" } }, "defaults": { "build": { "packtool": "" } }, "dfx": "0.7.2", "networks": { "local": { "bind": "127.0.0.1:8000", "type": "ephemeral" } }, "version": 1 }
Thecanisterssection specifies the name of the WebAssembly module for yourexplore_helloproject isexplore_hello.
Thecanisters.explore_hellokey specifies that the main program to be compiled is located in the path specified by the main setting, in this case,src/explore_hello/main.moand thetypesetting indicates that this is amotokoprogram.
Thecanisters.explore_hello_assetskey specifies configuration details about front-end assets for this project. Let's skip those for now.
Thedfxsetting is used to identify the version of the software used to create the project.
Thenetworkssection specifies information about the networks to which you connect. The default settings bind the local Internet Computer network to the local host address127.0.0.1and port8000.
If you have access to other Internet Computer network providers, thenetworkssection can include network aliases and URLs for connecting to those providers.
You can leave the default settings as they are. - Close the
dfx.jsonfile to continue.
New projects always include a template main.mo source code file. You can edit this file to include your own code to speed up the development cycle.
Let's take a look at the sample program in the default main.mo template file as a starting point for creating simple program using the Motoko programming language.
To review the default sample program for your project:
- Check that you are still in your project directory by running the following command:
pwd - Open the
src/explore_hello/main.mofile in a text editor and review the code in the template:
Let's take a look at a few key elements of this program:actor { public func greet(name : Text) : async Text { return "Hello, " # name # "!"; }; };- You might notice that this sample code defines an
actorinstead of amainfunction, which some programming languages require. For Motoko, themainfunction is implicit in the file itself. - Although the traditional "Hello, World!" program illustrates how you can print a string using a
printorprintlnfunction, that traditional program would not represent a typical use case for Motoko programs that run on the Internet Computer. - Instead of a print function, this sample program defines an
actorwith a publicgreetfunction that takes anameargument with a type ofText. - The program then uses the
asynckeyword to indicate that the program returns an asynchronous message consisting of a concatenated text string constructed using"Hello, ", the#operator, thenameargument, and"!".
actorobjects and asynchronous message handling more a little later. For now, you can continue to the next section. - You might notice that this sample code defines an
- Close the
main.mofile to continue.
Before you can build the default project, you need to connect to the Internet Computer network either running locally in your development environment or running remotely on a subnet that you can access.
Starting the network locally requires a dfx.json file, so you should be sure you are in your project's root directory. For this tutorial, you should have two separate terminal shells, so that you can start and see network operations in one terminal and manage your project in another.
To start the network locally:
- Open a new terminal window or a new terminal tab on your local computer.
- Navigate to the root directory for your project, if necessary.
- You should now have two terminals open.
- You should have the project directory as your current working directory.
- Start the Internet Computer network on your local computer by running the following command:
Depending on your platform and local security settings, you might see a warning displayed. If you are prompted to allow or deny incoming network connections, click Allow. After you start the local network, you have one terminal that displays messages about network operations and another for performing project-related tasks.dfx start - Leave the terminal that displays network operations open and switch your focus to the terminal where you created your new project.
After you connect to the Internet Computer network running locally in your development environment, you can register with the network to generate unique, network-specific canister identifiers for your project.
In the Quick start tutorial, this step was performed as part of the dfx deploy command work flow. This tutorial demonstrates how to perform each of the operations independently.
To register canister identifiers for the local network:
- Check that you are still in your project directory, if needed.
- Register unique canister identifiers for the canisters in the project by running the following command:
The command displays the network-specific canister identifiers for the canisters defined in thedfx canister create --alldfx.jsonconfiguration file.Creating a wallet canister on the local network. The wallet canister on the "local" network for user "pubs-id" is "rwlgt-iiaaa-aaaaa-aaaaa-cai" Creating canister "explore_hello"... "explore_hello" canister created with canister id: "rrkah-fqaaa-aaaaa-aaaaq-cai" Creating canister "explore_hello_assets"... "explore_hello_assets" canister created with canister id: "ryjl3-tyaaa-aaaaa-aaaba-cai"
Because you are connected to the Internet Computer network running locally, these canister identifiers are only valid locally and are stored for the project in the .dfx/local/canister_ids.json file.
For example:{ "explore_hello": { "local": "rrkah-fqaaa-aaaaa-aaaaq-cai" }, "explore_hello_assets": { "local": "ryjl3-tyaaa-aaaaa-aaaba-cai" } }
Now that you have explored the default configuration settings and program code and have started the Internet Computer network, let's compile the default program into an executable WebAssembly module.
To build the program executable:
- In the terminal shell on your local computer, navigate to your
explore_helloproject directory.
You must run thedfx buildcommand from within the project directory structure. - Build the executable canister by running the following command:
You should see output similar to the following:dfx build
Because you are connected to the Internet Computer network running locally, theBuilding canisters... Building frontend...dfx buildcommand adds thecanistersdirectory under the.dfx/local/directory for the project. - Verify that the
.dfx/local/canisters/explore_hellodirectory created by thedfx buildcommand contains the WebAssembly and related application files by running the following command.
For example, the command returns output similar to the following:ls -l .dfx/local/canisters/explore_hello/
The-rw-r--r-- 1 pubs staff 178 Apr 6 14:25 explore_hello.d.ts -rw-r--r-- 1 pubs staff 41 Apr 6 14:25 explore_hello.did -rw-r--r-- 1 pubs staff 155 Apr 6 14:25 explore_hello.did.js -rw-r--r-- 1 pubs staff 142 Apr 6 14:25 explore_hello.js -rw-r--r-- 1 pubs staff 157613 Apr 6 14:25 explore_hello.wasmcanisters/explore_hellodirectory contains the following key files:- The
explore_hello.didfile contains an interface description for your main program. - The
explore_hello.did.jsfile contains a JavaScript representation of the canister interface for the functions in your program. - The
explore_hello.jsfile contains a JavaScript representation of the canister interface for your program. - The
explore_hello.wasmfile contains the compiled WebAssembly for the assets used in your project.
canisters/explore_hello_assetsdirectory contains similar files to describe the front-end assets associated with your project. In addition to the files in thecanisters/explore_helloand thecanisters/explore_hello_assetsdirectories, thedfx buildcommand creates anidldirectory. - The
You've seen that the dfx build command creates several artifacts in a canisters directory for your project. The WebAssembly modules and the canister_manifest.json file are required for your program to be deployed on the Internet Computer network.
To deploy locally:
- In a terminal shell on your local computer, navigate to your explore_hello project directory.
- Deploy your
explore_helloproject on the local network by running the following command:
The command displays output similar to the following:dfx canister install --all
Run theInstalling code for canister explore_hello, with canister_id rrkah-fqaaa-aaaaa-aaaaq-cai Installing code for canister explore_hello_assets, with canister_id ryjl3-tyaaa-aaaaa-aaaba-cai Authorizing our identity (pubs-id) to the asset canister... Uploading assets to asset canister... /index.html 1/1 (480 bytes) /index.js 1/1 (296836 bytes) /main.css 1/1 (484 bytes) /sample-asset.txt 1/1 (24 bytes) /logo.png 1/1 (25397 bytes) /index.js.map 1/1 (964679 bytes) /index.js.LICENSE.txt 1/1 (499 bytes)dfx canister callcommand and specify the program and function to call by running the following command:
This command specifies:dfx canister call explore_hello greet everyoneexplore_helloas the name of the canister or application service you want to call.greetas the specific method or function you want to call.everyoneas the argument to pass to thegreetfunction.
greetfunction. For example:("Hello, everyone!")
If you have node.js installed in your development environment, your project includes a simple front-end example that uses a template index.js JavaScript file for accessing the explore_hello program in a browser.
To explore the default front-end template:
- Open a terminal shell on your local computer, if you don't already have one open, and navigate to your
explore_helloproject directory. - Open the
src/explore_hello_assets/src/index.jsfile in a text editor and review the code in the template script:
The templateimport { Actor, HttpAgent } from '@dfinity/agent'; import { idlFactory as explore_hello_idl, canisterId as explore_hello_id } from 'dfx-generated/explore_hello'; const agent = new HttpAgent(); const explore_hello = Actor.createActor(explore_hello_idl, { agent, canisterId: explore_hello_id }); document.getElementById("clickMeBtn").addEventListener("click", async () => { const name = document.getElementById("name").value.toString(); const greeting = await explore_hello.greet(name); document.getElementById("greeting").innerText = greeting; });index.jsfile uses twoimportstatements to explicitly create an agent instance and the actor for theexplore_hellocanister generated bydfx. This file works in conjunction with the templateindex.htmlfile to display an HTML page with an image asset, input field, and button for thegreetfunction. - Close the
index.jsfile to continue. - View the front-end assets created for the project by running following command:
The command displays output similar to the following:ls -l .dfx/local/canisters/explore_hello_assets/
These files were generated automatically by thedrwxr-xr-x 9 pubs staff 288 Apr 6 14:25 assets -r--r--r-- 1 pubs staff 2931 Dec 31 1969 assetstorage.did -r--r--r-- 1 pubs staff 265823 Dec 31 1969 assetstorage.wasm -rw-r--r-- 1 pubs staff 3651 Apr 6 14:25 explore_hello_assets.d.ts -rw-rw-rw- 1 pubs staff 2931 Dec 31 1969 explore_hello_assets.did -rw-r--r-- 1 pubs staff 4236 Apr 6 14:25 explore_hello_assets.did.js -rw-r--r-- 1 pubs staff 149 Apr 6 14:25 explore_hello_assets.js -rw-rw-rw- 1 pubs staff 265823 Dec 31 1969 explore_hello_assets.wasmdfx buildcommand using node modules and the templateindex.jsfile. - Open a browser and navigate to the
localnetwork address and port number—127.0.0.1:8000/—specified in thedfx.jsonconfiguration file. To specify the canister you want the web server to display, add thecanisterIdparameter and theexplore_hello_assetscanister identifier to the URL using the following syntax:
For example, the full URL should look similar to the following:?canisterId=<YOUR-CANISTER-IDENTIFIER>
You must use the case-sensitive canisterId parameter before the canister identifier.http://127.0.0.1:8000/?canisterId=rrkah-fqaaa-aaaaa-aaaaq-cai - Verify that you see the HTML page for the sample application.
For example: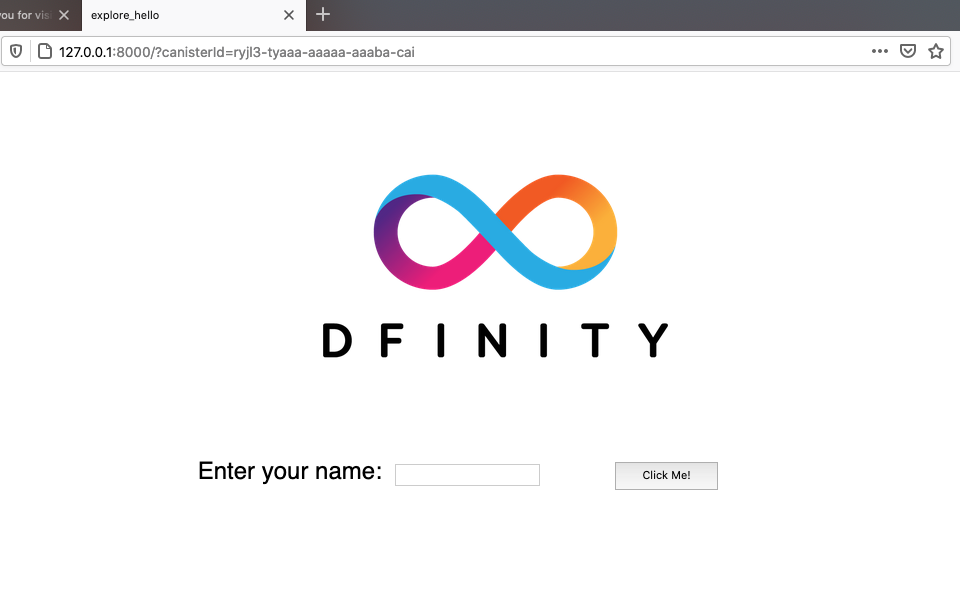
- Type a greeting, then click Click Me to return the greeting.
For example:
After you finish experimenting with your program, you can stop the local Internet Computer network so that it doesn't continue running in the background.
To stop the local network:
- In the terminal that displays network operations, press Control-C to interrupt the local network process.
- Stop the Internet Computer network by running the following command:
dfx stop